RAW Image Converter: A Complete Guide for 2026
Ayush Soni
Founder, File Studio
On this page
- What Is a RAW Image and Why Can't You Open It
- Why the file extension looks strange
- Why it needs a converter
- RAW vs JPEG The Technical Differences That Matter
- What the camera saves
- RAW vs JPEG At a Glance
- What this means in practice
- When You Should Convert RAW Images
- Situations where RAW earns its keep
- When JPEG is the sensible choice
- How to Convert RAW Files with Full Control
- Choose the result before you click convert
- A practical local workflow
- Metadata deserves a deliberate choice
- The Case for Offline and Private RAW Conversion
- Why online conversion feels easier than it is
- Why local conversion fits serious work better
- Recommended Workflows for Different Users
- For the professional photographer
- For the small business or team member
- For the student or hobbyist
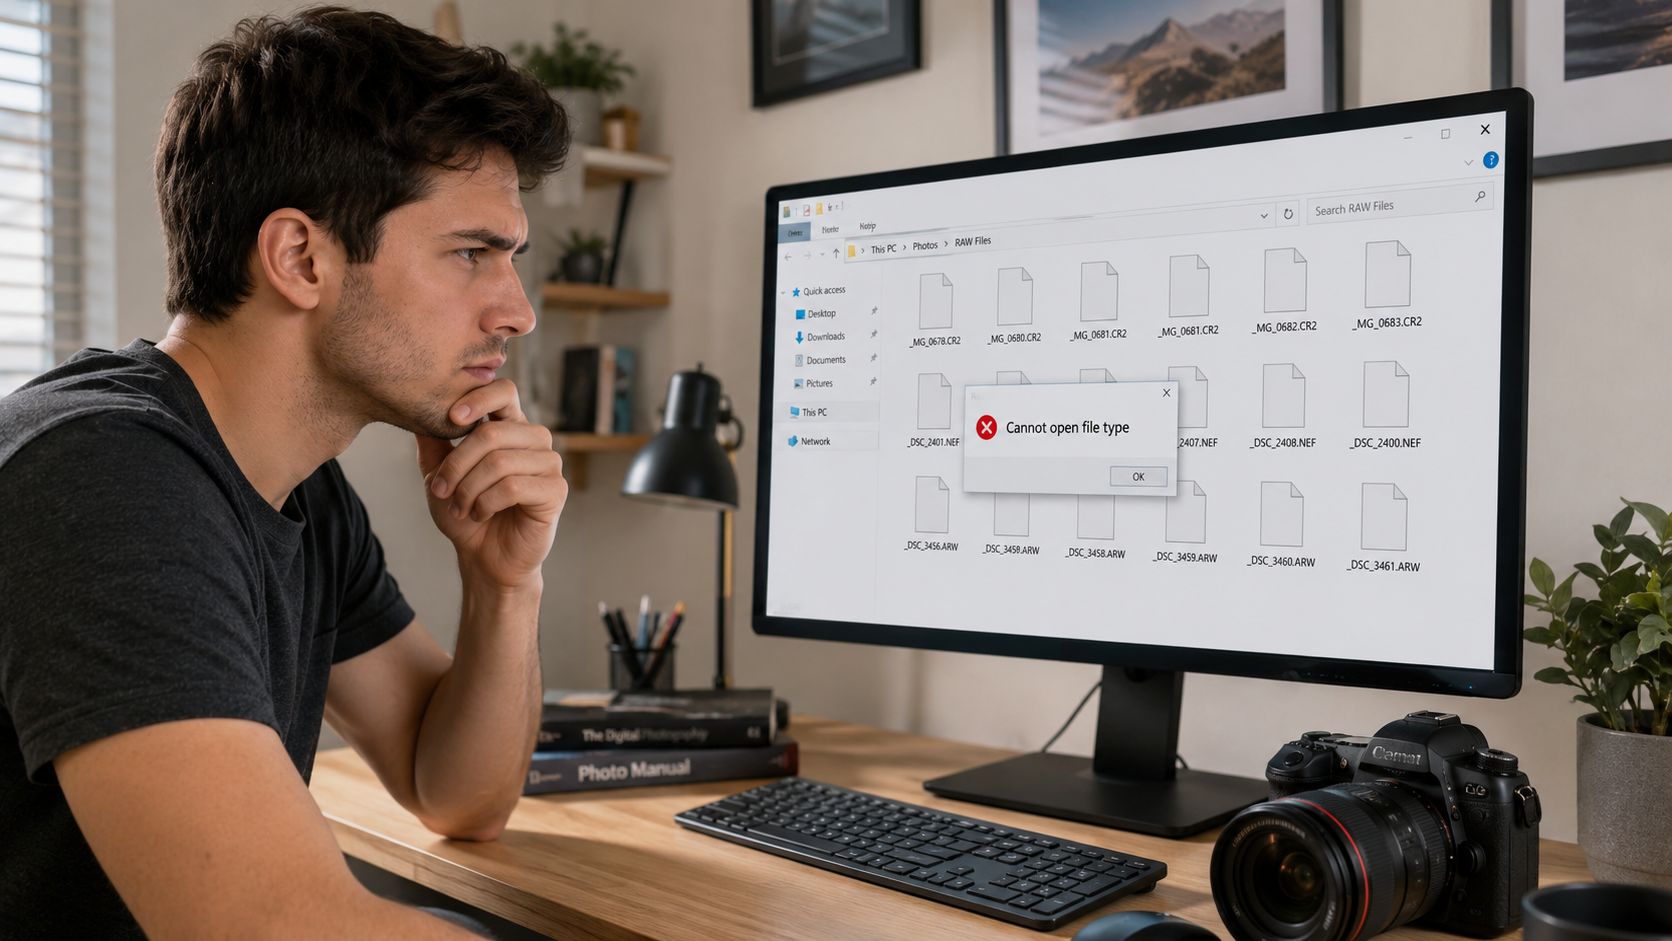
You copied a folder from your camera, sat down to edit, and found files your computer barely recognizes. Instead of cheerful previews, you see names like .CR3, .NEF, or .ARW. You double-click one, your default photo app hesitates, and suddenly something that felt simple, "just open the photo", turns into a format puzzle.
That moment confuses almost every photographer at first. The good news is that nothing is wrong with your files. In many cases, your camera captured more information, not less. You're looking at data that hasn't been developed into a finished picture yet. That's where a RAW image converter comes in.
If you also care about privacy, reliability, or handling large shoots without waiting on uploads, the conversation gets more interesting. Many beginners learn how to convert RAW files through browser tools first. That works for a quick test, but it leaves out the part that matters when the images are sensitive, the internet is unstable, or you need to process whole folders without babysitting the job.
What Is a RAW Image and Why Can't You Open It
You finish a shoot, copy the files to your laptop, and double click one of them, expecting a photo. Instead, you get a strange extension, a blank preview, or an error that says your system does not support the file. That moment confuses a lot of new photographers, especially because the image looked fine on the back of the camera.
A RAW file contains the lightly processed data captured by your camera sensor. It holds far more of the original scene information than a ready-to-share image file, which is why photographers treat it like the starting material for editing rather than the finished photo.
A JPEG is designed to open almost anywhere. A RAW file usually is not. Your camera brand records sensor data in its own format, and your computer needs software that understands that format before it can turn the data into a visible image.
Why the file extension looks strange
Those unusual file extensions are part of the reason RAW feels harder at first. Canon uses CR2 or CR3. Nikon uses NEF. Sony uses ARW. Fujifilm uses RAF. Each one is a manufacturer-specific container, with its own way of storing color data, preview images, and camera metadata.
So if your laptop refuses to open a file, the problem often is not the photo. The problem is that your system does not have the right decoder for that camera's RAW format yet. A newer camera can easily outpace the software built into an older computer.
If you want a broader view of how these formats differ from more familiar image types, this image format comparison guide gives helpful context.
Why it needs a converter
A RAW converter reads that sensor data, builds a full-color image from it, and lets you decide how the final photo should look before exporting to JPEG, PNG, or TIFF. Film photographers once made many of these decisions in the darkroom. RAW conversion is the digital version of that step.
That is the key idea many beginners miss. The RAW file is not broken, incomplete, or corrupted because it will not open in a basic viewer. It is unfinished by design.
Good conversion software also matters for privacy and reliability. If the images are client work, internal product photos, family portraits, or anything sensitive, uploading them to an online converter may be a poor trade. A local converter keeps the files on your own machine, works without an internet connection, and handles large batches more predictably when you have hundreds of images to process.
Metadata is part of this picture too. RAW files often include camera settings, lens details, capture time, and sometimes location information. If you have never inspected that hidden layer before, this guide on how to view image metadata explains what is stored and why it matters.
RAW vs JPEG The Technical Differences That Matter
The easiest way to understand the difference is this. RAW is ingredients. JPEG is the baked cake. With ingredients, you can still decide the recipe. With the baked cake, many decisions are already locked in.
A camera creating a JPEG makes fast choices on your behalf. It sharpens, compresses, adjusts color, and throws away some information to keep the file convenient. That's great when speed matters. It's limiting when the photo needs careful editing.
What the camera saves
RAW files usually preserve far more editing latitude because they start closer to the original sensor capture. JPEG files are built for quick use and broad compatibility.
A modern RAW image converter also does serious technical work under the hood. High-quality converters use advanced demosaicing algorithms to reconstruct full RGB values per pixel, with benchmarks showing PSNR gains of 2, 4 dB over basic methods. Processing in a 16-bit or 32-bit float color space can also reduce visible banding in gradients by up to 30, 50% compared with an 8-bit-only pipeline, which matters when you push skies, skin tones, or subtle tonal transitions during editing (Microsoft Apps listing).
For a deeper side-by-side look at modern formats beyond RAW and JPEG, this image format comparison guide is useful.
RAW vs JPEG At a Glance
| Attribute | RAW | JPEG |
|---|---|---|
| Starting point | Unprocessed sensor data | Processed in-camera image |
| Editing flexibility | High. Better for major exposure and color adjustments | Lower. Strong edits can break the image faster |
| File readiness | Needs a RAW image converter or compatible editor | Ready to open, send, and post |
| Compression | Minimal or camera-specific handling of source data | Compressed for smaller, easier files |
| Best use | Careful editing, archival work, difficult lighting | Fast delivery, casual sharing, quick turnaround |
What this means in practice
If you photograph a bright sky over a dark ground, JPEG often gives you a result that looks finished quickly. But if the camera guessed wrong, the sky can turn flat white or the foreground can sink into muddy shadow. RAW gives you a better chance to recover a natural-looking balance.
If you shoot portraits, the difference shows up in skin. Small color shifts, mixed indoor lighting, and white balance problems are much easier to correct when you start from RAW.
Practical rule: If the photo matters enough that you'd be disappointed by a bad in-camera guess, shoot RAW.
That doesn't mean JPEG is bad. It means JPEG is opinionated. RAW lets you keep your options open.
When You Should Convert RAW Images
Not every photo deserves the RAW treatment. Some do. Some don't. The trick is to stop thinking in absolutes and start thinking in intent.
By 2010, industry surveys indicated that more than 70% of working photographers shot at least some of their images in RAW rather than JPEG, largely because of the dynamic range, color fidelity, and post-processing flexibility RAW offers (Strolls With My Dog). That doesn't mean every frame should be RAW. It means experienced photographers reach for it when the file has to hold up under pressure.
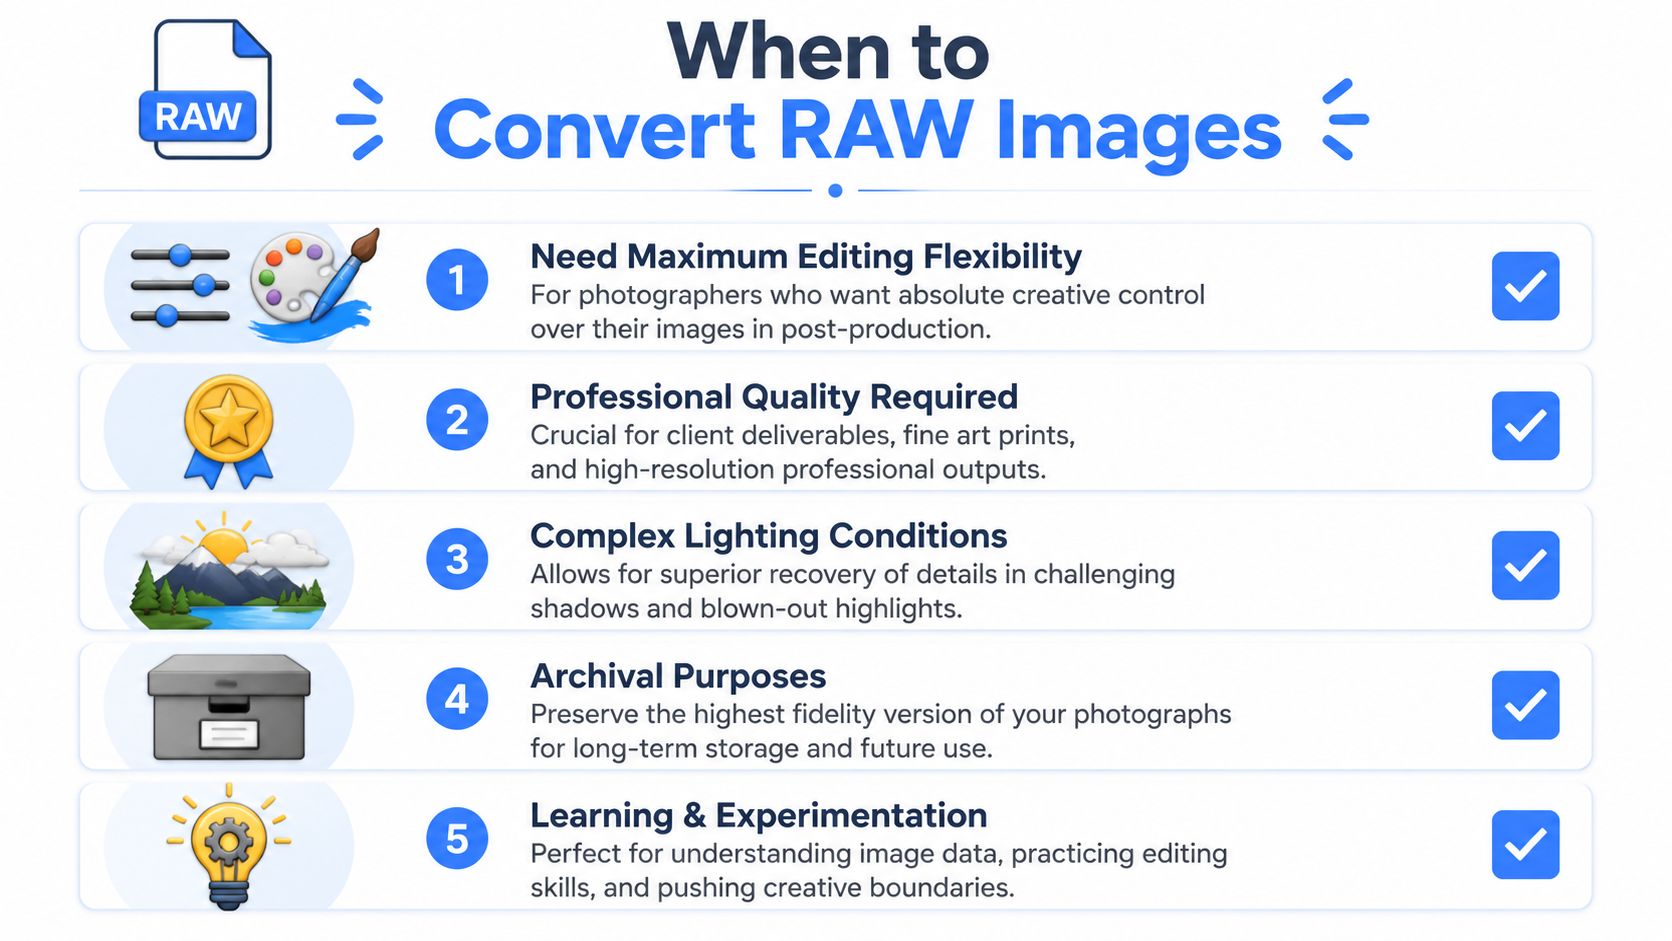
Situations where RAW earns its keep
Here are the moments where converting RAW files usually pays off.
- Scenic work in difficult light. Sunrise, sunset, backlit clouds, and bright horizons often exceed what a quick JPEG can gracefully handle. RAW gives you more room to shape the scene.
- Portrait sessions. Skin tone is unforgiving. If your white balance lands a little too warm or too green, RAW gives you more control to fix it naturally.
- Low-light events. Indoor receptions, concerts, and dim venues often need careful exposure and noise handling after the fact.
- Client or print work. If the image may end up in a brochure, gallery print, or paid deliverable, preserving maximum quality gives you safer options later.
- Learning. RAW is a great teacher because it shows you how exposure, color, and tone really behave when you start editing.
When JPEG is the sensible choice
JPEG is still the smart format in plenty of situations.
If you're sending quick family updates, posting casual travel snapshots, or shooting reference images, JPEG is often enough. It saves time, storage space, and decision fatigue. If you already know you won't edit much, the convenience can be worth more than the extra headroom.
There's also a middle ground many photographers use. Shoot RAW when the conditions are tricky or the images matter. Use JPEG when speed matters more than flexibility.
You don't need to become a RAW purist. You need to know when the extra data solves a real problem.
That's the shift. RAW isn't “better” in every circumstance. It's more useful when the image needs rescue, refinement, or long-term value.
How to Convert RAW Files with Full Control
You get the most from RAW when you treat conversion like making a print in a darkroom. The file already contains the scene. Your job is to decide how that scene should be rendered for the next use, whether that is sharing, editing, archiving, or client delivery.
Most of the terms that confuse beginners are simpler than they sound. Output format answers, "What job should this file do next?" Color space answers, "Where will this image be seen?" Bit depth answers, "How much flexibility do I want to keep if I edit again later?"
Choose the result before you click convert
A common mistake is to start with the RAW file and only later ask what kind of export you need. Start at the other end. Decide where the photo is going, then choose settings that fit that destination.
For sharing, delivery, or everyday use, JPEG is usually the practical choice. It opens almost anywhere and keeps file sizes manageable. For editing in another program or saving a higher-quality master, TIFF is the better container because it keeps more image information. PNG is useful in narrower cases, such as screen graphics or images that need transparency, but it is not the usual final format for photographs.
Bit depth is the part many people skip past. It matters most when you plan to keep editing. An 8-bit export gives you less room to push color and tone before you start seeing rough transitions. A 16-bit TIFF gives you more headroom, which is why photographers often keep one high-quality master export before making smaller JPEG copies. Fujifilm's RAW FILE CONVERTER EX powered by SILKYPIX is one example of a desktop workflow built around that kind of control.
A practical local workflow
If you want predictable results, use the same basic order each time.
- Copy the card to a clearly named folder so the originals stay untouched.
- Open the files in a desktop RAW converter and check the previews.
- Adjust the foundation first. White balance, exposure, highlights, shadows, and lens corrections usually matter more than creative effects.
- Choose your export type. JPEG for sharing, TIFF for further editing or archiving.
- Set the color space. sRGB is the safe option for web, email, and general viewing. Adobe RGB or wider spaces only make sense if the rest of your workflow supports them.
- Export in batches so the whole set stays consistent.
That order solves a lot of beginner frustration. You are making one clear decision at a time instead of clicking through a wall of options and hoping the defaults are right.
Local tools are especially helpful when you have a full shoot to process, no reliable internet connection, or photos you would rather not upload anywhere. If you want a way to convert files without uploading them, an offline-first workflow keeps the process private and predictable. If you handle large sets often, it also helps to automate image workflows so repeat exports, renaming, and format changes take less manual effort.
Metadata deserves a deliberate choice
RAW conversion changes more than pixels. It also affects the information attached to the file, such as camera model, lens, capture time, location data, and copyright fields.
Sometimes you want that information preserved. Archive copies, working masters, and client records often benefit from complete metadata. Public exports are different. A behind-the-scenes image, an internal office photo, or a proof sent outside your team may contain location or device details you never meant to share.
A good habit is simple. Keep metadata in the files you control. Strip it from copies that leave your hands.
That one setting is easy to miss, but it becomes an aha moment for many photographers. RAW conversion is not only about making the file viewable. It is also where you decide how much quality, flexibility, and privacy the next version should carry.
The Case for Offline and Private RAW Conversion
Browser-based converters are tempting because they look quick. Drag, drop, wait, download. For one non-sensitive file, that may be fine. But RAW files are large, information-rich, and often tied to work that isn't meant for third-party servers.
That's why privacy-first conversion deserves more attention than it gets.
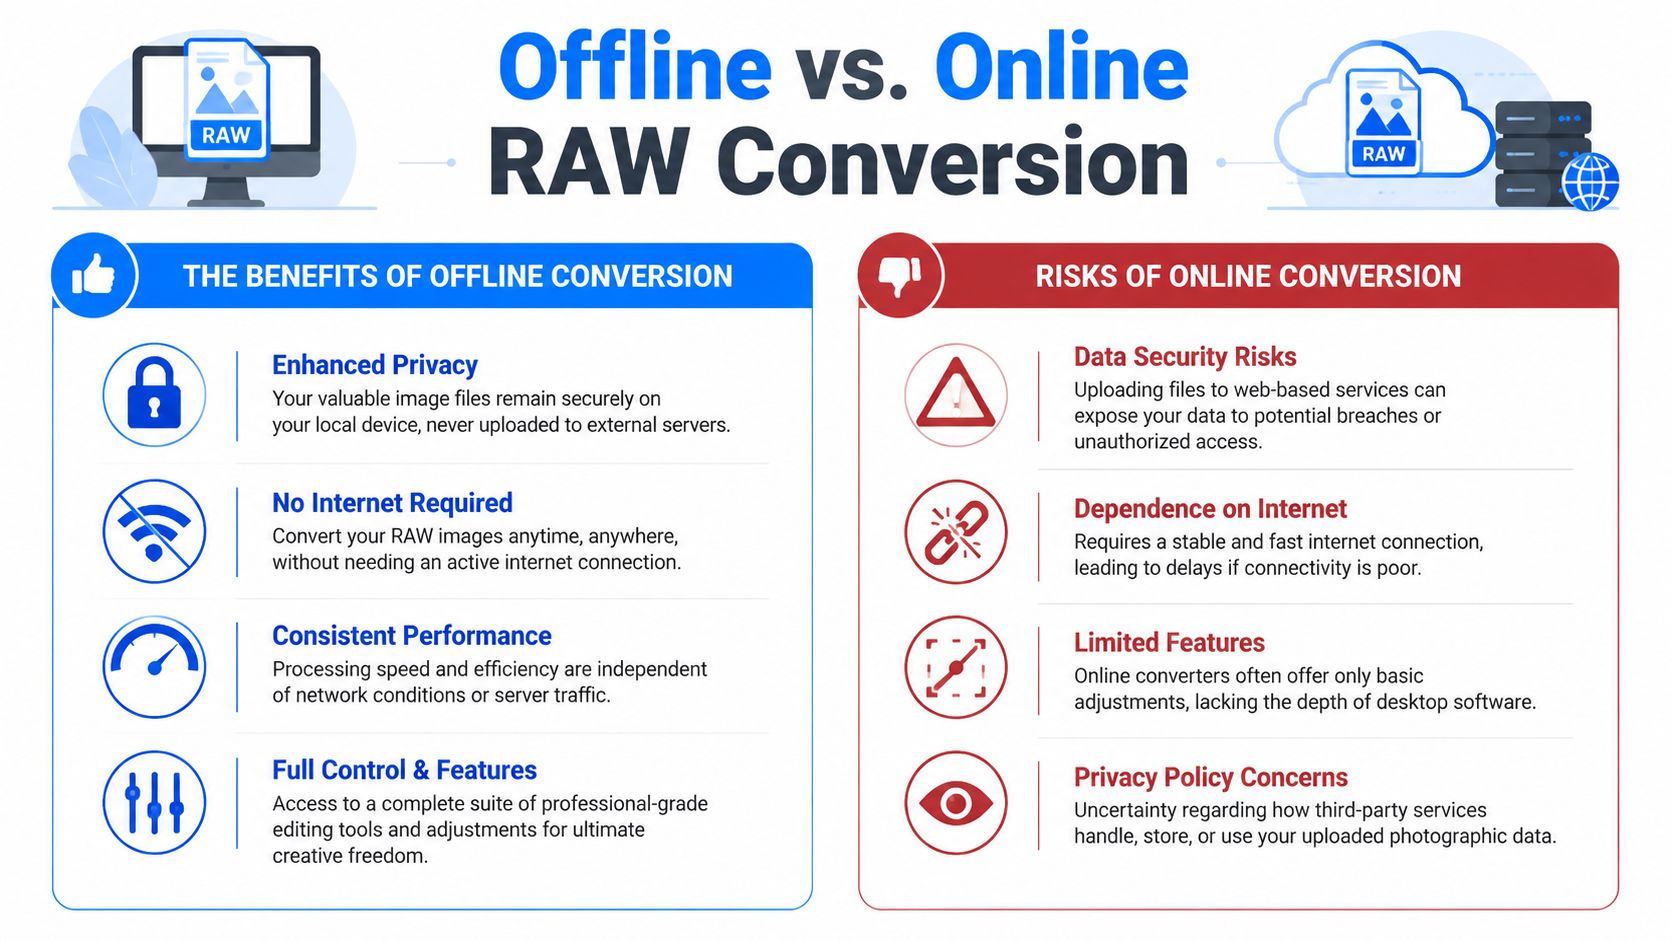
Why online conversion feels easier than it is
A browser tool hides several tradeoffs.
First, you have to upload the files. RAW images can be big enough that the upload becomes the slowest part of the job. Second, you often don't get fine control over output settings, metadata handling, or batch consistency. Third, you may not know exactly how long files remain on remote systems or what happens to embedded metadata unless you read the service terms carefully.
Existing content on RAW converters often overlooks these performance and privacy trade-offs. Industry reports indicate a growing emphasis on data privacy and local-first processing, yet many tutorials still don't compare offline batch workflows with online services in terms of latency, metadata retention, and compliance risk (industry commentary on privacy and local-first processing).
If your work touches legal, healthcare, finance, HR, education, or private client material, this isn't a theoretical concern. It's a workflow decision.
You can also explore local-first options for converting files without uploading when privacy is part of the requirement, not an afterthought.
Why local conversion fits serious work better
Offline conversion solves several problems at once.
- Privacy stays in your hands. Files remain on your device.
- Internet quality stops mattering. No slow uploads, stalled tabs, or failed transfers midway through a job.
- Batch processing becomes practical. You can work through large folders without the friction of one-file web forms.
- Metadata control is clearer. You decide whether to preserve or remove it before sharing.
- Travel and field work are easier. A laptop on a train, plane, or remote location can still get the job done.
A RAW workflow feels calmer when the converter is on your machine and the files never leave it.
That peace of mind is easy to underestimate until you're working with a deadline, poor Wi-Fi, or images you shouldn't upload.
Recommended Workflows for Different Users
A RAW workflow should fit the way you work. A wedding photographer on a deadline, a school staff member handling student images, and a hobbyist editing at home all need something different. The helpful question is simple: what do you need from the file later?
Support for many camera brands and RAW types still matters, especially if you change cameras, work with second shooters, or open older archives. A converter that works locally and handles batches well saves trouble later, not just today.
For the professional photographer
Start with the RAW files as your master archive. They work like digital negatives. You may deliver JPEGs to a client, but the RAW files are the version you return to when a print order comes in, a skin tone needs reworking, or a magazine asks for a different crop months later.
A practical workflow looks like this: ingest the full shoot, cull the obvious misses, apply basic corrections in batch, then convert selected files to 16-bit TIFF if the job needs detailed retouching or color-heavy editing. Export JPEGs only after that for proofs, galleries, and delivery folders. This keeps your highest-quality version intact while giving clients smaller files they can readily use.
If you regularly bring in hundreds or thousands of files after a job, a guide on how to manage event photo downloads can help tighten the handoff from camera card to organized project folder.
For the small business or team member
Your goal is usually consistency and control. You want clean, usable images without sending originals through a web tool that may compress files, strip useful metadata unpredictably, or create a privacy headache.
Keep the RAW files in a secure folder for recordkeeping and future edits. Then convert only the selected images into web-ready JPEGs with clear file names, sensible dimensions, and metadata removed when the images are leaving your organization. If your team uses Apple hardware, a local workflow for batch converting images on Mac makes repeated exports much easier.
This approach fits internal events, staff headshots, product shots, property photos, and documentation images. It is especially helpful when the images include private workplaces, client material, or anything you would rather not upload just to make smaller copies.
For the student or hobbyist
Keep the process light.
Pick a few strong RAW files. Adjust exposure, white balance, and contrast. Export high-quality JPEGs for sharing, and keep the RAW originals so you can revisit them later with better editing skills.
One simple exercise teaches a lot. Compare your own JPEG export with the camera's straight-out-of-camera JPEG and look at the highlights, shadows, and color. That side-by-side view usually creates the aha moment. RAW is not about making every photo dramatic. It is about keeping more room to recover what the camera saw before its built-in processing made permanent choices.
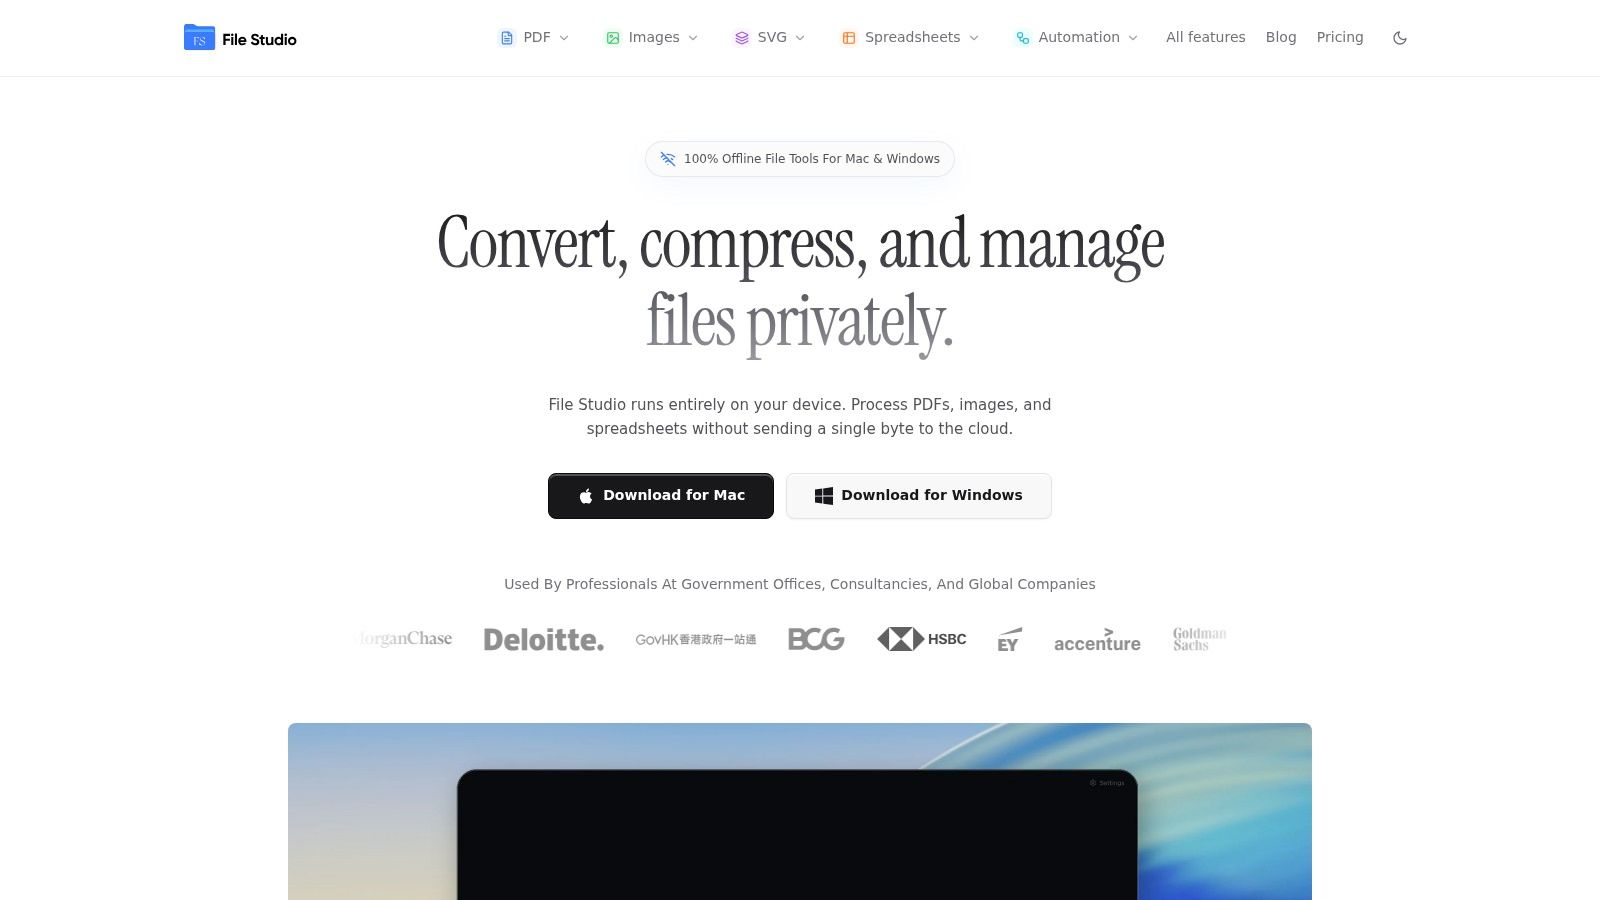
If you want a privacy-first way to convert RAW files locally, File Studio is built for exactly that kind of work. It runs on macOS and Windows, processes files entirely offline, supports batch image conversion, and gives you control over formats and metadata without sending your photos to a web service.