

How to Convert BMP to JPG Fast on Windows & Mac

Ayush Soni
Founder, File Studio
On this page
- Why You Still Need to Convert BMP to JPG in 2026
- Choosing Your Conversion Method A Quick Comparison
- Method 1 Simple Conversions with Built-in Tools
- On Windows with Paint
- On Mac with Preview
- Method 2 Powerful Batch Jobs with File Studio
- Why local processing matters
- A practical batch workflow
- Method 3 Scriptable Conversion with ImageMagick
- Single file commands
- Folder-level batch commands
- Mastering Quality and Compression
- What the quality slider really does
- A safe default for most people
- Handling Metadata and Transparency Pitfalls
- Metadata can expose more than the picture
- JPG does not keep transparency
You open an old scan, a screenshot, or a file pulled from a legacy Windows system, try to attach it to an email, and the upload stalls or gets rejected. The image looks ordinary. The file size doesn't. That's usually the moment people realize they're dealing with a BMP.
If you're trying to figure out how to convert BMP to JPG quickly, the clicks are easy. The key questions are which method fits your situation, what quality setting won't wreck the image, and whether you're about to upload sensitive files to a tool you shouldn't trust. That's where most guides stop short.
This is the practical version. Use the built-in app if you have one file and need it done now. Use a local desktop tool if you have batches or confidential documents. Use ImageMagick if you want repeatable automation. And before you convert anything private, check what hidden metadata may travel with it.
Why You Still Need to Convert BMP to JPG in 2026
BMP is still around because old workflows don't disappear cleanly. Scanners, screenshots, archived Windows files, and niche software still produce it. The problem isn't that BMP is broken. The problem is that it stores image data without compression, so the files are much larger than they need to be for normal sharing.
Microsoft introduced BMP in 1987 as part of Windows 1.0, and it persisted as a native uncompressed raster format. That design leaves BMP files 6 to 10 times larger than comparable JPEGs for the same dimensions and color depth, according to this BMP to JPG format history and size breakdown. The same source notes that a 1024x768 BMP at 24-bit color occupies 2.36 MB, while converting it to JPEG at 85% quality typically brings it down to about 0.35 MB, an 85.2% reduction.
That gap explains most day-to-day frustration:
- Email attachments fail because the image is larger than expected.
- Web forms reject uploads even though the picture doesn't look high resolution.
- Shared folders bloat when old bitmap images pile up.
- Mobile viewing suffers because BMP isn't the format people expect on the modern web.
Practical rule: If the image is meant to be viewed, shared, attached, or uploaded, JPG is usually the right destination. If it's meant for editing without loss, keep the original too.
JPG became the common format for distribution for a reason. It trades a small amount of data precision for dramatically smaller files and broad compatibility. For most screenshots, scans, and photos, that trade is worth it. The only time it isn't is when you need transparency, exact lossless preservation, or editing flexibility later.
Choosing Your Conversion Method A Quick Comparison
The fastest way to choose a method is to stop thinking in terms of software and start thinking in terms of use case. One file is different from fifty files. A public product photo is different from a scanned passport or contract.
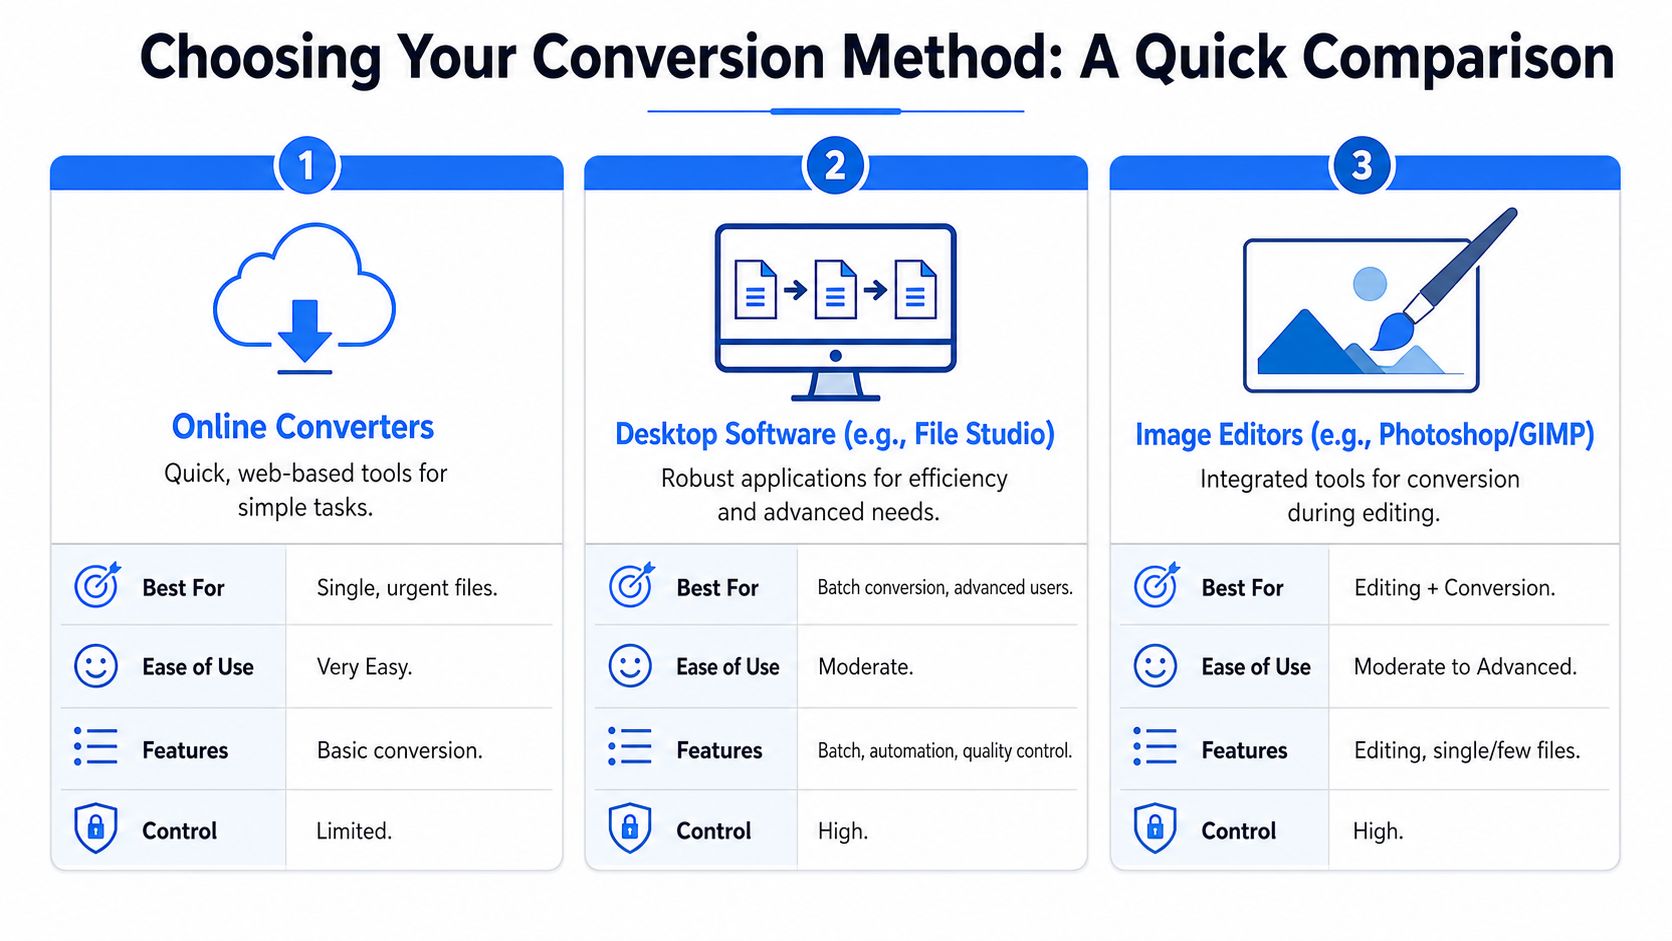
| Method | Best for | Ease of use | Control | Main trade-off |
|---|---|---|---|---|
| Built-in tools | One-off conversions | Very easy | Basic | Slow for batches |
| Desktop software | Batches, repeat work, private files | Moderate | High | Requires installation |
| Image editors | Editing plus export | Moderate to advanced | High | Overkill if you only need conversion |
| Command line | Automation and large sets | Advanced | Very high | Not friendly for casual users |
A simple way to decide:
- Need one file converted right now: Use Paint on Windows or Preview on Mac.
- Need to process many files locally: Use a desktop converter with batch controls.
- Need to crop, retouch, or adjust before export: Use an image editor such as Photoshop or GIMP.
- Need repeatable automation: Use ImageMagick.
Most people don't need the "most powerful" method. They need the one with the fewest chances to make a mistake.
The mistake I see most often isn't technical. It's convenience-driven. People grab the first free web converter they find, upload a folder of scans, and never ask where those files went or what metadata stayed attached. If the files are personal, legal, HR, finance, or client-facing, local processing is the safer path.
Method 1 Simple Conversions with Built-in Tools
If you only have one BMP, built-in apps are the shortest path. They aren't fancy, but they work.
On Windows with Paint
Paint is still one of the simplest ways to convert BMP to JPG.
- Open the BMP file in Paint. You can right-click the file and choose Open with > Paint.
- Check the image first. If the picture has a transparent background, stop here and consider PNG instead. JPG won't preserve transparency.
- Click File.
- Choose Save as.
- Select JPEG picture.
- Pick a save location, rename the file if needed, and save.
That's it. For quick support calls, this is the method I usually give first because almost every Windows user already has it.
A few limits matter:
- No strong batch workflow: You'll repeat the process file by file.
- Minimal quality control: You don't get the kind of output tuning available in dedicated tools.
- Easy to overwrite originals: Save to a different folder if the source matters.
On Mac with Preview
Preview handles this cleanly on macOS and gives you a little more export flexibility.
- Open the BMP in Preview.
- Go to File > Export.
- In the Format dropdown, choose JPEG.
- Adjust the quality slider if Preview shows it.
- Choose where to save the new file.
- Click Save.
If the Format option isn't visible, hold the Option key while opening the export menu. macOS sometimes hides extra choices until you do.
Use Preview when:
- you have a screenshot or scan that needs to go out by email,
- you want a local conversion with no upload step,
- or you need a quick check of the exported result before sending it.
Keep the original BMP if the image came from an old archive or a system export. Once you save as JPG, you're working with a compressed copy, not the original bitmap data.
For one file, built-in tools are hard to beat. For repeated work, they become tedious fast.
Method 2 Powerful Batch Jobs with File Studio
Batch conversion changes the problem. You're no longer asking how to convert one BMP to JPG. You're asking how to do it reliably across a folder without leaking private files, losing track of outputs, or clicking through the same dialog over and over.
Why local processing matters
Most guides act like all converters are interchangeable. They aren't. Privacy alone changes the decision.
A 2025 Gartner survey cited in this discussion of offline conversion and privacy risks found that 68% of users expressed concern about data privacy in cloud-based file tools, and emerging 2025-2026 data in the same source says 42% of small businesses require offline file processing for confidential workflows. That's sensible. If you're converting IDs, contracts, HR documents, legal scans, or internal screenshots, uploading them to a browser tool isn't just a convenience choice. It's a risk decision.
That's where a local desktop workflow makes sense. File Studio's feature set covers offline image conversion, batch processing, destination control, and metadata handling on macOS and Windows. For this kind of work, local processing matters more than novelty.
A practical batch workflow
A common real-world example is a folder of scanned BMPs from an older office process. Maybe someone exported them years ago from a copier workflow. Maybe they came off a legacy Windows machine. Either way, nobody wants to open and re-save them one at a time.
A safer batch routine looks like this:
- Put all BMPs in a dedicated source folder.
- Choose JPG as the output format.
- Set a consistent quality level instead of guessing per file.
- Send exports to a separate destination folder so the originals stay untouched.
- Review a few outputs before deleting or archiving the BMP set.
- Strip unnecessary metadata if the files will leave your organization.
That last step gets skipped constantly. It shouldn't.
- For admin teams: local batch conversion keeps routine document handling off third-party servers.
- For legal and HR work: separate output folders reduce mistakes and make audit trails easier.
- For archives: preserving the original BMPs while distributing JPG copies gives you a clean working pattern.
- For mixed jobs: one desktop tool is easier to standardize than a patchwork of web tabs and ad-supported converters.
What doesn't work well is a browser queue full of confidential files, especially when you don't know how long they're retained or what metadata gets processed on the other end.
If you wouldn't email the raw file to a stranger, don't upload it to a random converter either.
For everyday office work, the right batch tool isn't the one with the most buttons. It's the one that keeps files local, processes folders consistently, and makes it difficult to overwrite or misplace the originals.
Method 3 Scriptable Conversion with ImageMagick
If you do this often, the command line is faster and more consistent than manual export. ImageMagick is the tool I reach for when the job needs to be repeatable, especially in IT support, shared folders, or automated cleanup tasks.
Single file commands
For one file, keep it simple:
magick input.bmp -quality 85 output.jpgThat tells ImageMagick to read the BMP, compress it as JPEG, and save the result at a quality level that's usually a safe default.
If you want a different output name or folder, just change the path:
magick "C:\Images\scan.bmp" -quality 85 "C:\Images\Converted\scan.jpg"Folder-level batch commands
For bulk work, the benchmark command worth knowing is magick *.bmp -quality 85 -format jpg output_%d.jpg, which this ImageMagick batch workflow reference says can process hundreds of files in seconds and achieve 5, 10× faster throughput than GUI-based converters while keeping quality settings consistent.
That consistency matters more than people think. The same source notes that in machine learning pipelines, validation scores drop by more than 1% when JPEG quality falls below 85%, because the image distribution changes.
Use ImageMagick when:
- You manage recurring folders: script once, reuse forever.
- You need standard output settings: every file gets the same quality rule.
- You support teams: command-based workflows are easier to document than click-by-click instructions.
A few cautions:
- Watch your destination path. It's easy to dump converted files into the wrong folder if you're rushing.
- Test on copies first. Batch commands are efficient, not forgiving.
- Quote paths with spaces. That's a common source of failed commands on user machines.
For technical users, this is often the cleanest answer to how to convert BMP to JPG at scale.
Mastering Quality and Compression
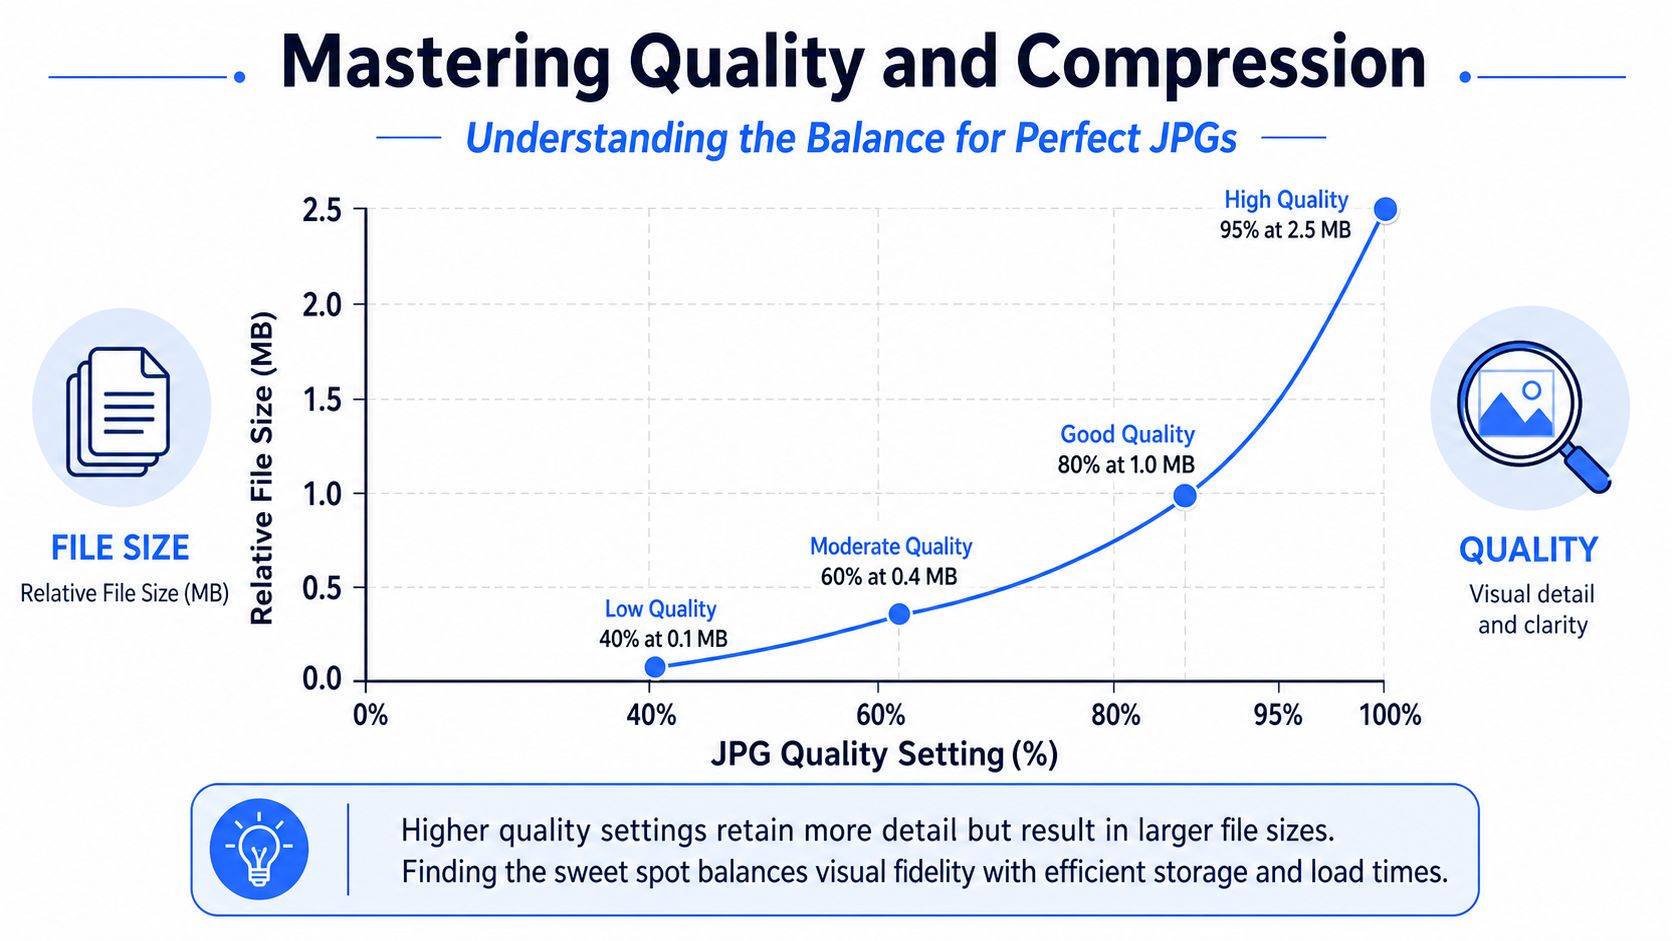
The quality slider confuses people because it sounds like a pure visual setting. It isn't. It's really a trade-off control between detail retention and file size.
What the quality slider really does
JPEG gets its smaller size from lossy compression. The BMP is read as raw pixel data, then the JPEG pipeline applies color conversion, DCT-based compression, quantization, and Huffman encoding. The result is a much smaller file because some high-frequency detail gets discarded.
According to this explanation of BMP to JPEG compression and quality settings, conversion from BMP to JPEG typically reduces file size by about 85% to 95%. The same source says a 10 MB BMP often becomes 0.5 MB to 1.5 MB, and 85% quality usually gives the best balance where visual fidelity remains indistinguishable to the human eye while still shrinking the file aggressively.
A safe default for most people
In practice, I treat the quality setting like this:
- Around 85%: safest default for most photos, scans, and email attachments.
- Higher settings: useful when you expect close inspection or follow-on edits.
- Lower settings: fine for thumbnails and lightweight web use, but easier to overdo.
The same size-versus-quality judgment shows up in other media too. If you also work with property media, AgentPulse has a useful guide on how to compress real estate video files for web delivery. The principle is the same. Keep enough quality for the viewer, but don't carry unnecessary weight.
If you want a non-technical explanation of what compression is doing behind the scenes, this overview of how file compression works in practical terms is a helpful companion.
A giant JPG isn't a badge of quality. It often just means the export settings were sloppy.
Handling Metadata and Transparency Pitfalls
Most bad conversions aren't visibly bad until after sharing. The image opens fine. The problem is hidden.
Metadata can expose more than the picture
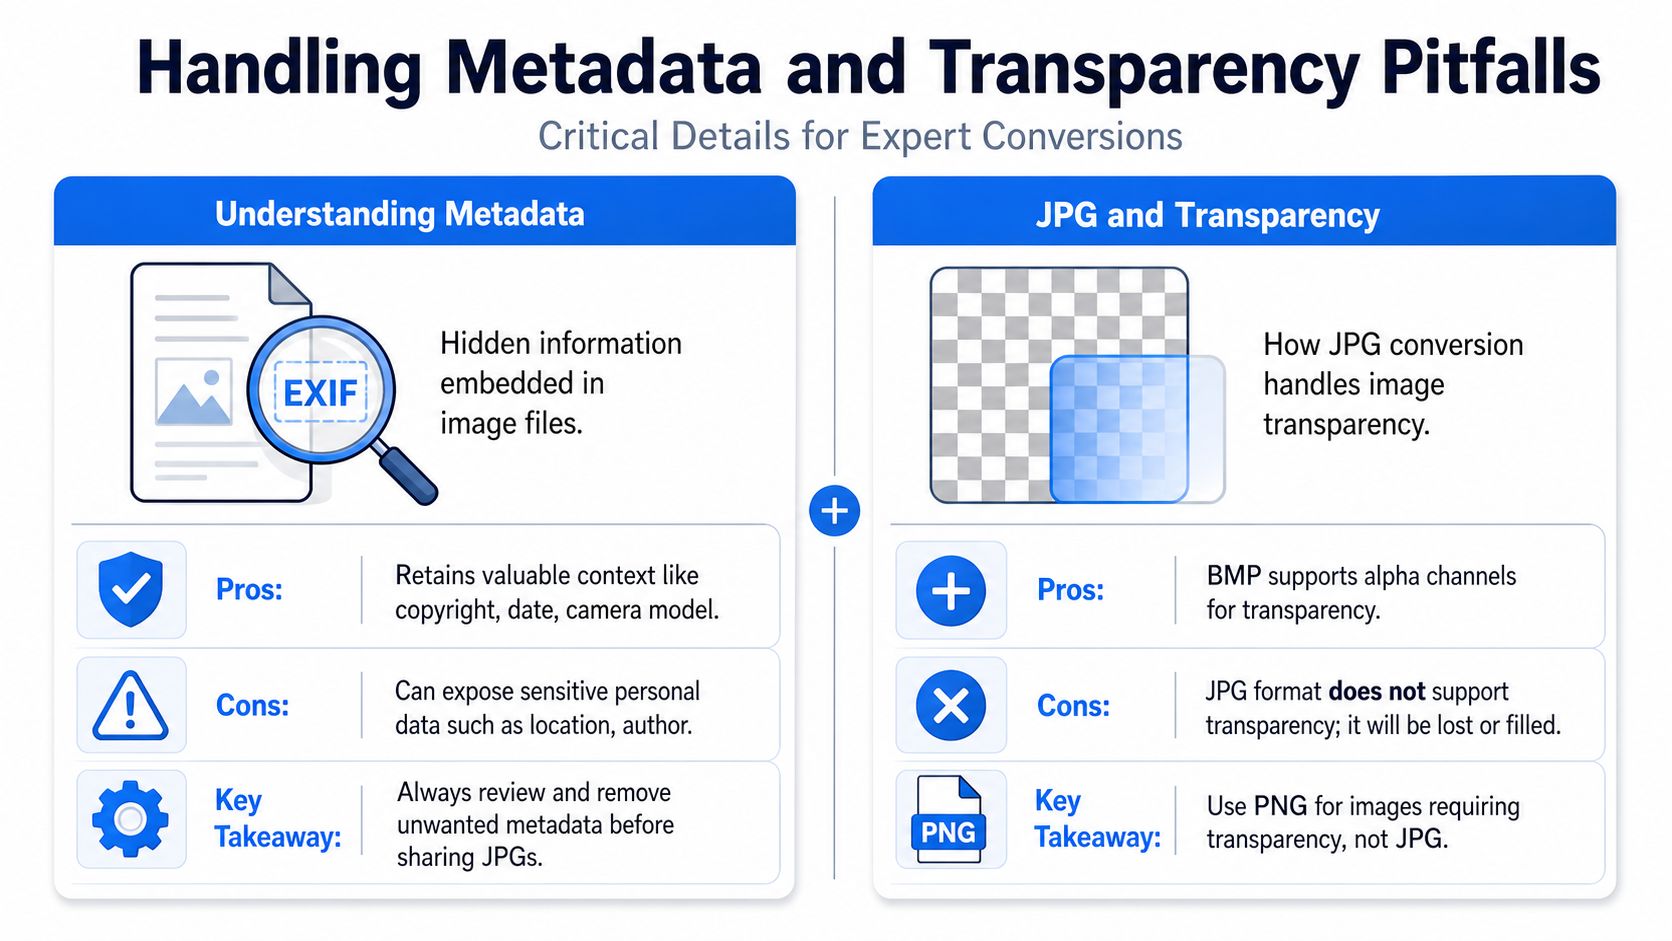
Metadata is the extra information stored with a file. Depending on the workflow, that can include author details, timestamps, software history, and other embedded fields. For ordinary family photos, that may be harmless. For business documents and sensitive screenshots, it can be a problem.
This is one reason local conversion is safer when the content is private. Online tools may process more than the visible image, and users rarely inspect the exported file before sending it. The same logic applies to video assets too. If you work across file types, ClipCreator.ai's video compression tips are a good reminder that optimization and information exposure often travel together.
If you're dealing with images that may have transparent areas and want to understand format behavior before exporting, this guide to PNG to JPG transparency handling shows the same underlying issue from the opposite direction.
JPG does not keep transparency
This catches people all the time with logos, UI captures, and exported graphics. A 32-bit BMP can contain an alpha channel, but JPG doesn't support transparency. This technical note on BMP to JPEG conversion pitfalls recommends converting to PNG instead when alpha matters, or using a converter that branches based on bit depth.
Use this rule:
- If the background must stay transparent, choose PNG.
- If the image is a photo or scan with no transparency requirement, choose JPG.
- If you're not sure, inspect the source before converting.
That's the difference between a clean export and a support ticket asking why the background turned white or black.
If you convert images often, especially in batches or with sensitive files, File Studio is a practical local option for macOS and Windows. It handles BMP to JPG conversion offline, keeps files on-device, and fits the kind of repeat work that built-in tools make tedious.