

How to Compress File on Mac: 4 Essential Methods

Ayush Soni
Founder, File Studio
On this page
- Why You Need to Compress Files on Your Mac
- The Quickest Method Instant Compression with Finder
- Compress a single file
- Compress multiple files together
- Compress an entire folder
- What Finder is actually doing
- Smartly Shrinking Images and PDFs in Preview
- Why Preview matters here
- Reduce image size in Preview
- Shrink a PDF in Preview
- Where Preview starts to show its limits
- Gaining Full Control with Terminal Commands
- Create a basic ZIP archive
- Exclude Mac-only clutter
- Choose speed or compression
- When Terminal is the better choice
- Secure Offline Compression for Privacy and Workflows
- When local processing matters
- Better for repeated workloads
- What to look for in an offline tool
- Comparing Methods and Understanding Trade-Offs
- Mac Compression Method Comparison
- The trade-offs that actually matter
- A practical way to choose
- Frequently Asked Questions About File Compression
- Can I password-protect a ZIP file on Mac
- What's the difference between ZIP, RAR, and 7z
- How do I unzip a file on Mac
You're probably here because a file won't send. Mail rejects the attachment, a client portal stalls on upload, or a folder of photos looks small enough until macOS tells you otherwise. On a Mac, “compressing” can mean a few different things, and picking the wrong method is why people waste time zipping files that barely shrink.
The good news is that macOS already gives you several useful options. The fast path is Finder's built-in ZIP command. For images and PDFs, Preview often works better than generic zipping. For clean handoffs to Windows or Linux users, Terminal is the tool that avoids the usual Mac clutter. And if you handle sensitive documents, local offline tools are worth a serious look.
If the immediate problem is email, size limits are usually only part of the story. A practical companion read is this comprehensive guide to sending videos, especially if your “too large” file is really a clip, screen recording, or exported presentation. If you want a fast primer on the basics before diving in, this overview of file compression is also useful.
Why You Need to Compress Files on Your Mac
The most common compression problem on a Mac is boringly familiar. You finish a deck, export a PDF, drag it into an email, and get told the file is too large. Or you bundle a project folder for a coworker and realize it includes way more bulk than you expected.
Compression solves a few different problems at once. It can reduce file size, package multiple files into one archive, and make a folder easier to send or store. That's why ZIP has stuck around for so long. It's simple, built into macOS, and almost everyone can open it.
But many basic tutorials stop too early. Not every file shrinks the same way, and not every job should start with a right-click ZIP. A text-heavy folder, a group of JPEGs, a scanned PDF, and a set of confidential contracts all call for slightly different decisions.
Practical rule: If your goal is convenience, zip it. If your goal is real size reduction, use a tool that targets the file type.
That distinction matters on a Mac because macOS gives you both kinds of workflows. Finder is the fastest. Preview is smarter for images and PDFs. Terminal gives you control when you need a clean archive that won't annoy someone on another operating system. And for private documents, offline-only tools can make more sense than tossing files into a browser-based converter.
The Quickest Method Instant Compression with Finder
For everyday use, Finder is still the fastest way to compress a file on Mac. It's built in, takes a few seconds, and creates a standard .zip archive that works almost anywhere.
Compress a single file
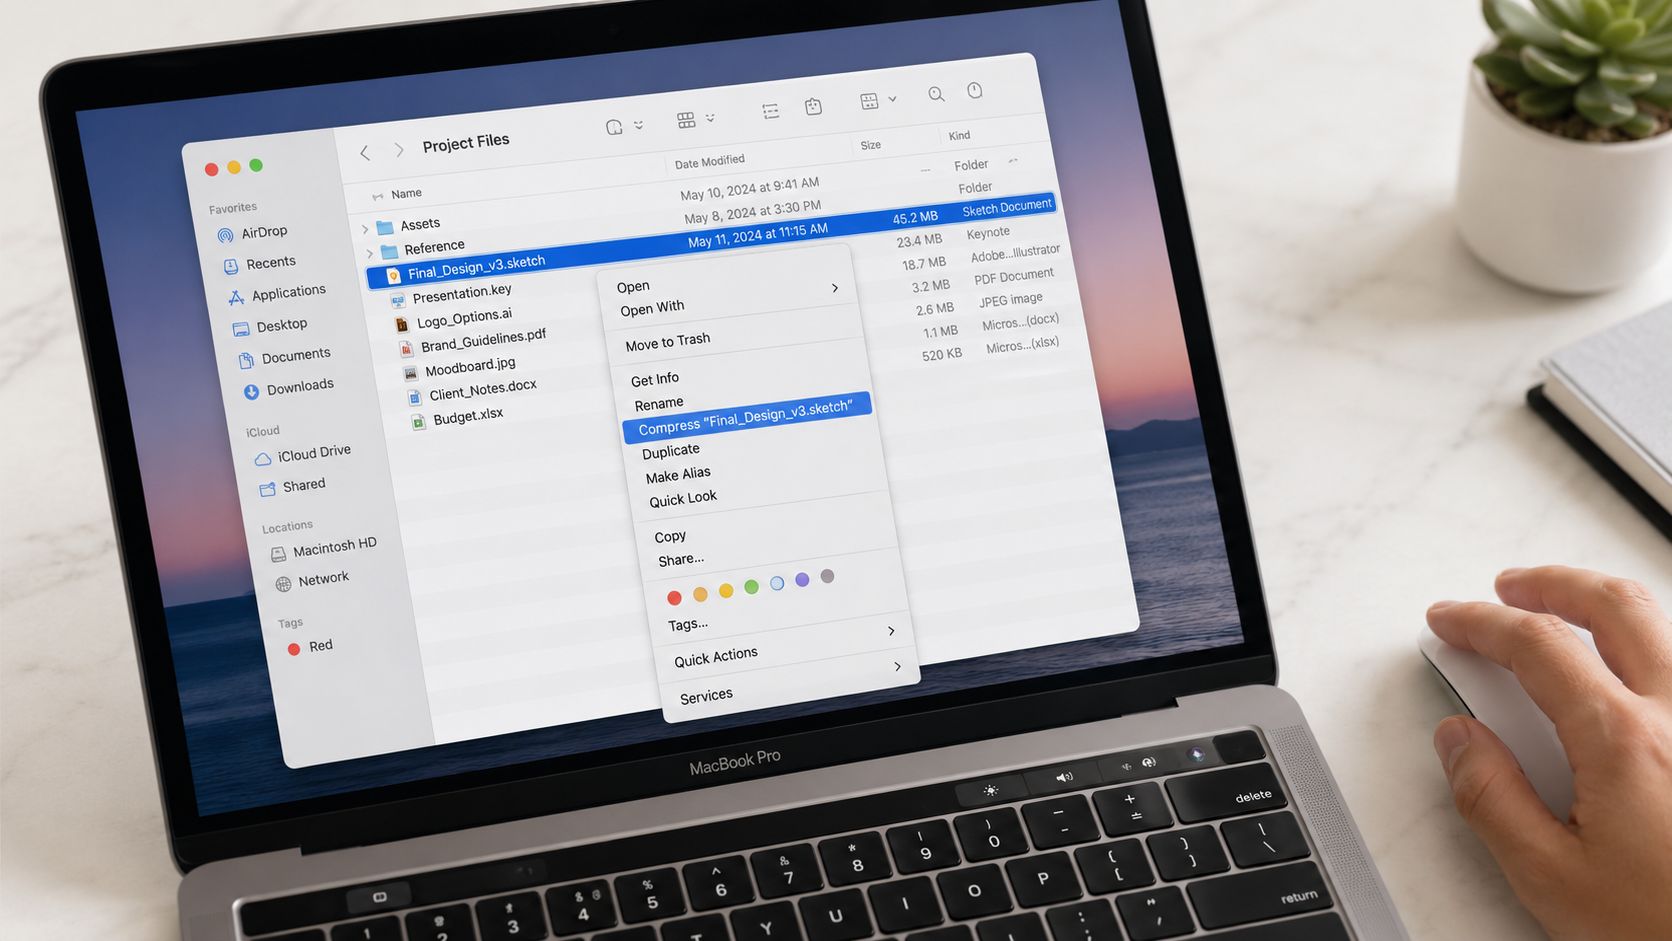
Control-click or right-click the file in Finder, then choose Compress “filename”. macOS creates a ZIP archive in the same folder with the same base name.
That's the quickest fix for things like Word documents, spreadsheets, Keynote files, and small project assets. You don't need to install anything, and the recipient usually just double-clicks to unpack it.
Compress multiple files together
Select several files first, then right-click and choose Compress X Items. macOS puts them into one ZIP archive.
This is useful when you want one clean attachment instead of six separate files. It also keeps the group together, which helps when you're sending a logo package, a set of forms, or several drafts for review.
Compress an entire folder
Right-click the folder and choose Compress “foldername”. Finder zips the whole directory structure, including subfolders.
That's the generally recommended method for archiving a project folder before sending it. It preserves organization and reduces the chance that someone misses a file.
What Finder is actually doing
Finder's Compress command creates a ZIP archive using macOS's native tools. Apple's native file compression on the Mac traces back to Snow Leopard 10.6 in 2009, when macOS introduced individual file compression through the filesystem without third-party tools, initially via the ditto command before GUI integration, as described in this history of HFS+ file system compression.
That history matters because Finder's current simplicity hides some limits. You can't choose a compression level in the GUI. You can't exclude junk files. You also shouldn't expect dramatic size reduction from everything you zip.
Finder is the best default when speed and compatibility matter more than fine-tuning.
Use it for routine sharing and light archiving. If you need cleaner output, better media optimization, or more control over what goes into the archive, switch methods instead of fighting the right-click menu.
Smartly Shrinking Images and PDFs in Preview
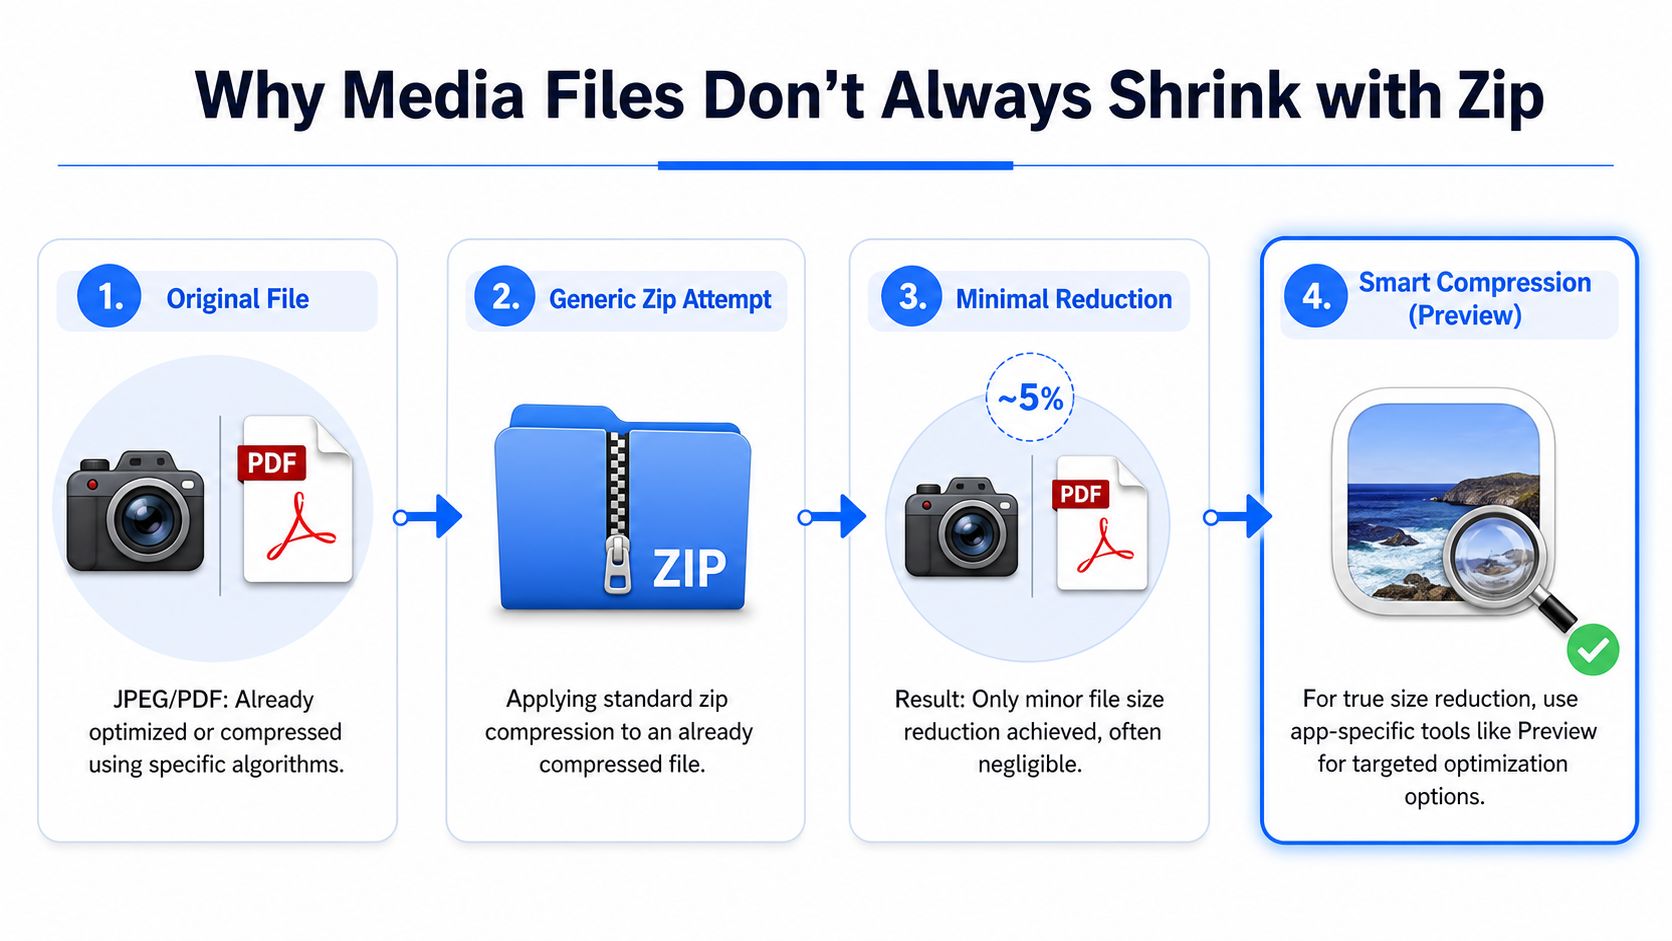
A common Mac workflow goes wrong here. Someone right-clicks a 12 MB photo or a bulky PDF, creates a ZIP, and ends up with a file that is barely smaller. The problem is not Mac compression. The problem is using archive compression on files that usually need format-specific reduction.
Why Preview matters here
Preview solves a different problem than Finder. Finder bundles files for sharing. Preview reduces the size of many images and PDFs by re-exporting them with lighter settings.
That distinction saves time. If the file is a photo, scan, screenshot, brochure, or signed PDF, Preview is often the first tool to try.
Reduce image size in Preview
Open the image in Preview, then choose File > Export. The export window gives you the controls that matter: format, quality, and sometimes resolution.
A few practical options work better than others:
- Convert PNG to JPEG for photos: PNG is excellent for screenshots, UI elements, and graphics with transparency. It is usually a poor choice for camera photos. Saving a photo-like image as JPEG can cut the file size a lot.
- Use HEIC in Apple-heavy environments: HEIC is efficient, but compatibility is not universal. It works well if the file will stay inside Apple apps, devices, or AirDrop-based handoffs.
- Lower quality on purpose: For email, internal docs, and slide decks, a slightly compressed image often looks fine at normal viewing size. The original is better kept for print, design edits, or future reuse.
One practical rule I use: if text in a screenshot starts looking soft, or skin tones in a photo start looking blotchy, the quality setting went too far.
Shrink a PDF in Preview
Open the PDF, choose File > Export, then look for Quartz Filter. Select Reduce File Size, save a copy, and compare the result before you send it.
This works best on PDFs built from scans or large embedded images. It is less impressive on PDFs that are already optimized, such as text-heavy exports from Word, Pages, or a browser print dialog.
Preview's PDF reduction is convenient, but blunt. It can make a scanned document much easier to email, yet it can also soften diagrams, blur fine print, or make signatures look rough. For a more focused walkthrough, see this guide to shrinking a PDF file size.
Save a copy first. Do not overwrite the original until you confirm that text, stamps, forms, and line art still look acceptable.
Where Preview starts to show its limits
Preview is strong for one-off fixes. It is not built for repeatable production work.
You cannot batch a large set of exports with much control. You cannot fine-tune PDF compression the way a print or prepress workflow might require. You also need to watch compatibility. JPEG is widely accepted but loses transparency. HEIC saves space but can create friction for people outside the Apple ecosystem. PDF size reduction is quick, but output quality can swing more than expected.
That is the actual trade-off. Preview is the right middle ground when Finder does too little and Terminal would be overkill.
Gaining Full Control with Terminal Commands
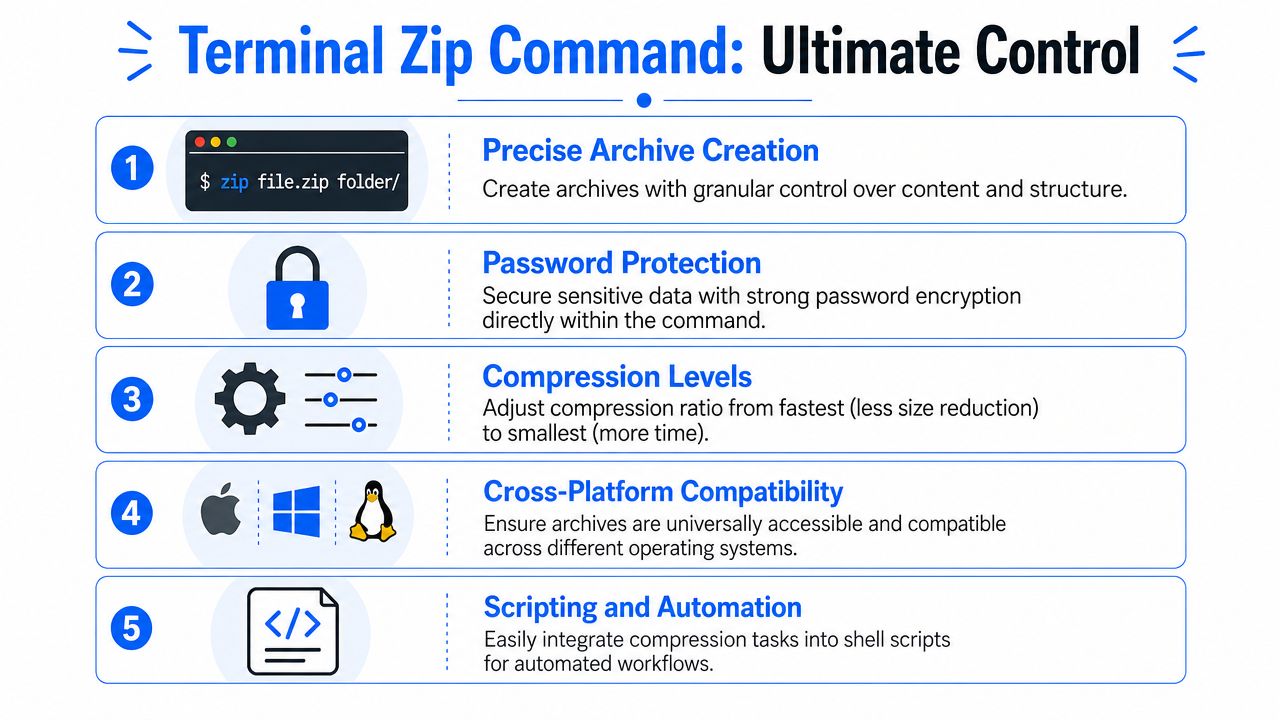
Finder is quick, but Terminal is where Mac compression becomes precise. If you've ever sent a ZIP to a Windows or Linux user and heard back about weird hidden folders, this is the fix.
Create a basic ZIP archive
Open Terminal and use:
zip -r archive.zip /path/to/folder/-r means recursive, so it includes the contents of subfolders too. This is the command-line equivalent of zipping a folder in Finder, but now you decide exactly how it behaves.
Exclude Mac-only clutter
A lot of beginner guides miss this. If you zip a folder normally, you can end up passing along hidden Mac artifacts that are useless to the recipient.
The clean solution is:
zip -r archive.zip /path/to/folder/ -x "*/\__MACOSX" -x "*/\.*"That command excludes __MACOSX folders and hidden dotfiles such as .DS_Store, as covered in this Terminal method for creating cleaner cross-platform ZIP archives.
If you regularly share files with non-Mac users, this is one of the most useful commands to keep around. It produces cleaner handoffs and avoids the “why is there extra junk in this archive?” conversation.
Clean archives feel more professional. They also reduce confusion for teammates who don't live in macOS all day.
Choose speed or compression
The GUI in Finder doesn't let you set compression strength. Terminal does. The native zip command uses a default compression level of -6, and you can change it from -0 for no compression and maximum speed to -9 for best compression and slower processing, as explained in this overview of macOS compression behavior and ZIP settings.
Use that control wisely:
-0for speed: Handy when you mostly want packaging, not reduction.-6for general use: A sensible middle ground and the default.-9for text-heavy archives: Better when size matters more than time.
For example:
zip -r -9 archive.zip /path/to/folder/When Terminal is the better choice
Terminal makes sense when the archive itself matters, not just the act of shrinking a file. It's ideal for developers shipping source code, designers passing folders to mixed-platform teams, and admins who want predictable output every time.
It also fits repeated workflows better. Once you have the right command, you can save it in a shell history, script it, or build it into an automation routine. Finder can't compete with that level of repeatability.
Secure Offline Compression for Privacy and Workflows
Compression isn't only about size. Sometimes the main issue is where your files go during the process. If you're handling contracts, invoices, IDs, HR documents, or internal reports, sending them through an online converter may not be acceptable at all.
When local processing matters
A browser tool can be convenient, but it introduces a separate question that basic Mac compression guides rarely address. Are you comfortable uploading the file in the first place?
For casual files, maybe that's fine. For legal paperwork, client records, passport scans, or finance documents, many teams prefer a workflow that stays on the Mac from start to finish. That's where offline desktop tools become the practical option, not just the cautious one.
One example is this offline file converter for Mac, which keeps processing local instead of routing documents through a web service. That model suits people who need compression, conversion, and cleanup in one place without relying on uploads.
Better for repeated workloads
The other reason local tools matter is volume. Preview is fine for one PDF. Finder is fine for one folder. Neither is great when someone in operations, admin, or design has to process batches of files every day.
Common cases include:
- Office document batches: A team member needs to compress many PDFs before uploading them to a portal.
- Image-heavy folders: Marketing or photography work often needs resizing, format conversion, and compression together.
- Metadata-sensitive handoffs: Files may need cleanup before they leave the machine.
A dedicated desktop workflow beats a patchwork of Finder, Preview, and browser tabs. You spend less time jumping between tools and less time checking whether a web service changed the file in a way you didn't want.
Privacy-first compression is less about paranoia and more about control. Sensitive files stay local, and the workflow stays predictable.
What to look for in an offline tool
If you decide Finder and Preview aren't enough, look for a desktop app that handles more than one narrow task well. Compression alone is rarely the whole job. Usually you also need format conversion, batch handling, metadata cleanup, or output control.
A solid local workflow should let you:
- Process files offline: No upload queue, no browser dependency.
- Handle batches: One file at a time gets old quickly.
- Work across file types: PDFs, images, and mixed folders often show up together.
- Keep output organized: Naming, destinations, and repeatable settings matter.
That combination is what makes a compression setup sustainable instead of merely possible.
Comparing Methods and Understanding Trade-Offs
Compression on Mac gets easier once you stop treating every file the same. A folder of Word docs, a JPEG gallery, a PDF deck, and a video export all respond differently, so the best method depends on the job in front of you.
Mac Compression Method Comparison
| Method | Best For | Ease of Use | Control | Privacy |
|---|---|---|---|---|
| Finder | Fast everyday ZIP files, folders, email attachments | Very easy | Low | High on-device |
| Preview | Smaller images and PDFs through re-exporting | Easy | Medium | High on-device |
| Terminal | Clean archives, cross-platform sharing, repeatable workflows | Moderate | High | High on-device |
| Offline desktop tool | Sensitive files, batch processing, mixed file workflows | Moderate | High | High on-device |
The trade-offs that actually matter
Finder is the fastest starting point. Select the file, compress it, and send it. For ordinary sharing, that is often enough.
Its limit is efficiency. ZIP works well on text-heavy files and folders with documents, but it usually does very little for JPEGs, MP4s, and other formats that already use compression. If a video barely shrinks after zipping, Finder is behaving normally, not failing.
Preview solves a different problem. It does not just wrap the file in a ZIP container. It can reduce image dimensions, change format, or apply PDF filters, which is why it often beats Finder for image and PDF size reduction. The trade-off is quality control. Push the settings too far and the file gets smaller, but the output may look worse than expected.
Terminal gives the cleanest control. It is the method I use when archive structure matters, filenames need to stay predictable, or the ZIP is going to Windows users who will notice odd metadata and path issues. The cost is speed at the beginning. You need the right command, and one typo can put the archive in the wrong folder or include files you did not mean to ship.
Offline desktop tools sit in the middle. They are less immediate than Finder, but much easier to repeat than manual Preview work. They make sense when compression is only one step in a larger local workflow, especially if you also need conversion, batch handling, or file cleanup before sharing sensitive material.
A practical way to choose
Use Finder for one-off archives and quick folder sharing.
Use Preview when your objective is a smaller image or PDF, not just a zipped copy of the original.
Use Terminal when you need precision, repeatability, or a cleaner archive for cross-platform handoff.
Use an offline tool such as File Studio when the workload is mixed, repetitive, or privacy-sensitive.
That is the main trade-off. Finder is quickest. Preview can shrink the right file types more effectively. Terminal gives you control. A local desktop tool saves time once the work stops being occasional.
Frequently Asked Questions About File Compression
Can I password-protect a ZIP file on Mac
Yes, but not from Finder's basic Compress menu. Finder creates standard ZIP archives without a password prompt. If you need password protection, Terminal is the more likely route because it gives you command-level control over how the archive is created.
What's the difference between ZIP, RAR, and 7z
ZIP is the most universal format. macOS handles it natively, and most recipients can open it without extra software. RAR and 7z can offer different compression behavior and are common in power-user workflows, but they're less friction-free for everyday sharing because the recipient may need additional software.
How do I unzip a file on Mac
Usually, just double-click the ZIP file in Finder. macOS uses Archive Utility to extract it into the same folder. If that fails, control-click the archive and choose to open it, or use a utility app if the file came from a less common archive format.
If you compress files on your Mac often, the biggest upgrade isn't memorizing more commands. It's using the right method for the file in front of you. For quick ZIPs, Finder is enough. For images and PDFs, Preview is smarter. For clean cross-platform archives, Terminal is hard to beat. And for private batch workflows, a local tool can save a lot of hassle.
If you want one local app for compressing, converting, organizing, and cleaning up files without uploading anything, File Studio is worth a look. It runs offline on desktop, handles PDFs and images in batches, and fits the kind of sensitive workflows where browser-based tools aren't a good option.